CAMERA HITCHES A RIDE
The Piggyback Method
For this method you need:
- A camera that lets you take long exposures with cable release as discussed earlier
- An equatorially mounted telescope – this mount must be very stable or the vibrations will ruin the picture.
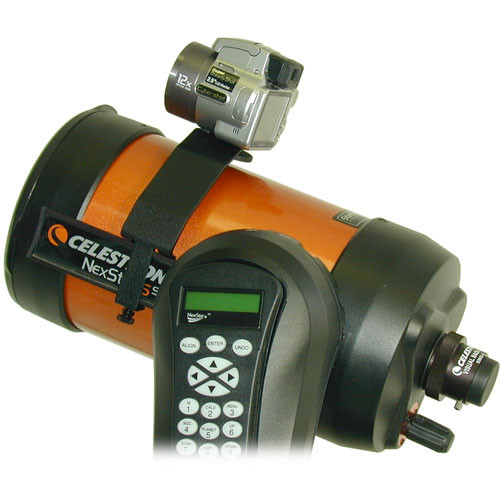
- Some method of attaching your camera to your telescope
Please note that the telescopes optics are not used at all with this method, it is simply being used as a platform for the camera (piggybacking).
Set up your equatorial mount as normal, aligned with the celestial pole. Attach your camera so that it points in the same direction as the telescope, and focus the camera on infinity (don’t forget this bit, or you’ll be wasting your time!). This can be done with any thing- I use (carefully) a clamp off my drum kit! However there are piggyback attachments available for most telescopes with a standard fitting that fits any camera’s tripod attachment.
Throughout the course of the exposure you will have to keep moving the telescope very slowly, so that the stars in it’s field of view stay centered. You use the telescope itself to guide the exposure, making sure that the camera is tracking the stars. Even if you have a motor-drive, you will still have to keep checking it, as no guidance is perfect. Make sure that a bright star in the area you want to photograph is centered in the telescope’s eyepiece.
It helps to have an eyepiece with a crosshair on it, but good results can be achieved without it. If, while the camera’s shutter is open, you keep this star in the center of the eyepiece by moving the RA axis, the photo will come out perfectly, with all the stars exposed as single points. In reality, though, its not perfect, and you must allow for some inaccuracy in your guiding.
The accuracy of your guiding depends on the ratio of the magnification of the camera’s lens and the eyepiece (as well as your skill and patience!). If the eyepiece you are using gives 40x magnification and the camera lens is 50mm (considered 1:1- 1x magnification) any error in your guiding (or vibration) will be 40x smaller on film.
If the ratio is too low (e.g. you are using a telephoto lens or the mount is unstable and causing vibrations) then your errors will be visible on film and ruin the photograph, so either increase the magnification, or decrease the magnification focal length) of the camera lens. Don’t have the ratio too high though so that you panic over the what looks like a large deviation in the eyepiece but is really only tiny on film.
You may be wondering if you can do this with an Alt-az mounted scope, if you track carefully. The answer is you can, to some extent. Because the camera is not aligned with the Earth’s axis, the field of view appears to rotate slowly even if you track perfectly (causing an effect similar to star trails at the pole). In my experience you can take exposures on a 35mm lens up to a couple of minutes before this sets in. If possible, align it in polar mode.
This is a very challenging method- there are many pitfalls that could ruin your shot. Don’t get discouraged – this method has a lot of potential and the most fantastic photographs cam be taken with just an ordinary camera and telescope accurately and carefully guided. I’ve personally found this to be the most rewarding method.